You’re redesigning a WordPress site. You’re using the new Gutenberg editor to take full advantage of the flexibility of blocks. But what about your old content that was created using WordPress 4 (or WordPress 5 with the Classic Editor plugin activated)? How do you migrate your pre-Gutenberg content into your brand-new site?
We actually just went through this exact dilemma ourselves — the site you’re visiting right now uses Gutenberg WordPress. Here’s what we learned from migrating our own content over to the new CMS:
Use Classic Blocks
WordPress offers a very easy, out-of-the-box way to handle legacy content. The Classic block uses the familiar TinyMCE editor and WordPress shortcodes. It’s like turning off Gutenberg just for that block of content — while still letting you add new blocks around it. Any content that isn’t inside a Gutenberg block is automatically treated as being inside a Classic block.
Because this is WordPress’s fallback if content isn’t already marked up to be Gutenberg-ready, you don’t have to do anything special to use it for migrated content. Export the content of the posts from your old site, import it into the new site, and you’ll be ready to go! (Okay, it’s probably not quite that easy. You’ll also need to make sure your new site styles look good with your legacy content.)
One drawback to this approach is that all of your content for each post is within a single block, so while you can add new blocks before or after it, you can’t easily, say, insert a brand-new custom CTA block in between two paragraphs. However, for content you want to keep as part of the new site — but that you won’t be going back and regularly editing — such as an archive of blog posts, this is the easiest way to bring your existing content over.
Turn Classic Content into Gutenberg Blocks
Another option, albeit a more complex one, is to break your legacy content into Gutenberg blocks. WordPress identifies blocks by HTML comments. A paragraph tag surrounded by <!– wp:paragraph –> and <!– /wp:paragraph –> becomes a Paragraph block, a heading with <!– wp:heading –> and <!– /wp:heading –> becomes a Heading block, and so on. Thus, if you import content with those comments in place, WordPress will treat it as if you’d composed it with the Gutenberg editor.
Since some Gutenberg blocks have options that you’ll also need to include, the easiest method I found was to start with a demo page on the new site showing all of the possible blocks for a content type and to look at how the content was stored in the database, in order to reverse-engineer the comment syntax with all of the necessary options. It’s important to follow the comment syntax exactly! A missing space can be enough to prevent WordPress from recognizing your instructions.
When exporting your content, you’ll also need to run it through the wpautop function to ensure that all of your paragraphs actually have <p> tags around them. I used the WP All Export plugin, which allows you to export content into a custom XML file and do some pre-processing of the content.
You’ll then need to do some manipulation of your export file before importing it to add the appropriate Gutenberg comments. I used some quick and dirty PHP scripts with DOMDocument to map headings, paragraphs, and lists to their appropriate Gutenberg blocks. Anything more complex was left as a Classic block.
One caveat to this approach is that I also left images as Classic blocks, as the Image Gutenberg block options required a media ID, but those wouldn’t be created until WP All Import ran the import.
Even with some limitations, however, the legacy content is ready for further editing with Gutenberg.
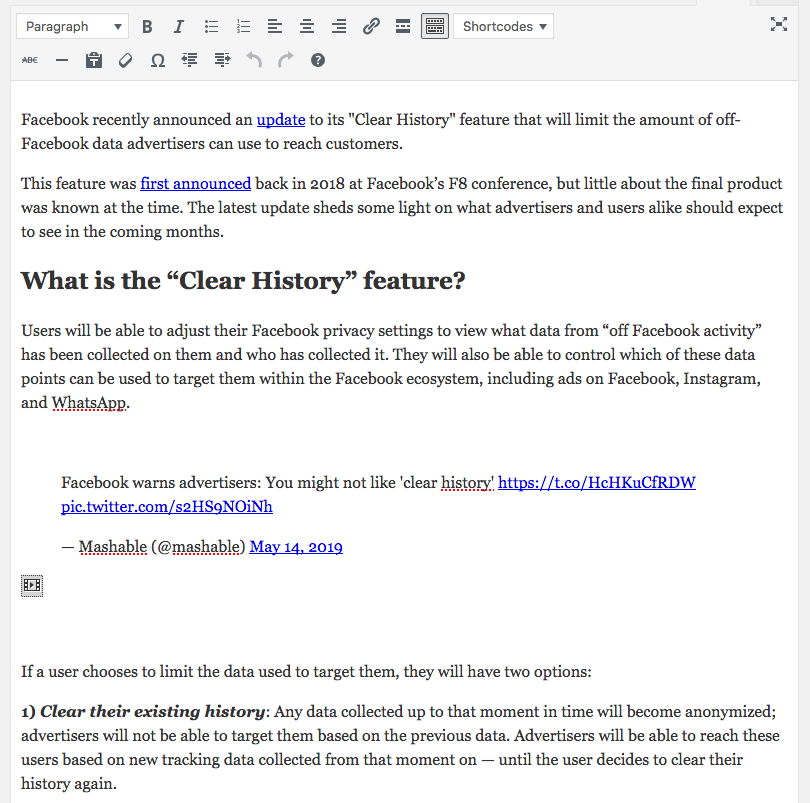
Before:

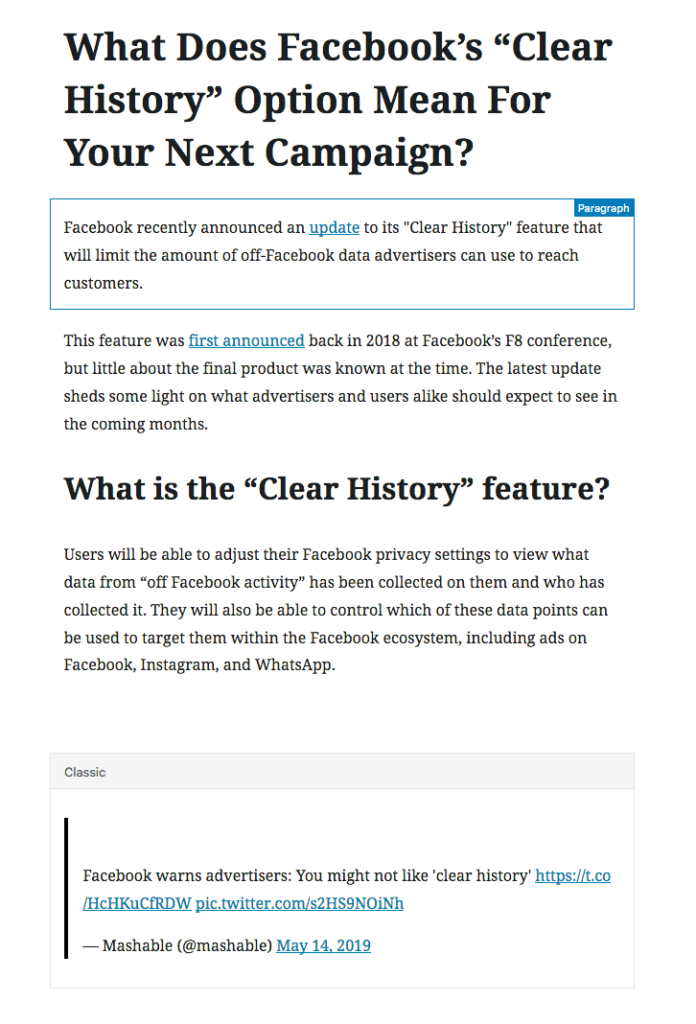
After:

Handling Advanced Custom Fields
What if your content isn’t in the WYSIWYG editor, however, but is structured with Advanced Custom Fields? You can migrate the content in a similar fashion by using WP All Export to create an output template that wraps the fields you want to migrate in the appropriate markup and content.
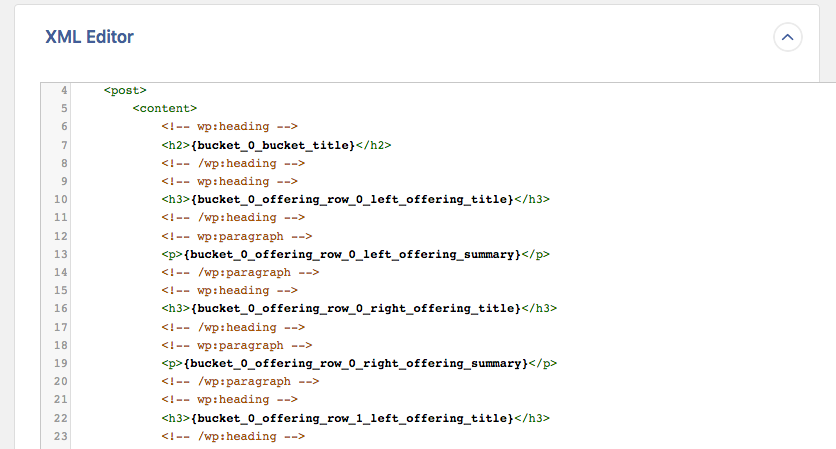
The screenshot below shows an export template for a series of Repeater fields that will become heading and paragraph blocks:

As discussed above, you need to follow comment syntax exactly, so having a demo entry to refer to is extremely helpful.
Your new site might be using Advanced Custom Fields too, as ACF supports custom Gutenberg blocks as of release 5.8 of ACF Pro. You can migrate content into ACF blocks, but the syntax is a bit more complicated. First, you’ll need to make sure you include an empty id parameter as well as a JSON object of the fields and their content.
Example:
<!-- wp:acf/cta-banner {"id":"","data":
{"field_5cd0a4a3988d4":"106","field_5cd0a70e988d5":"
{bucket_0_headline}","field_5cd0a754988d6":"","field_5cd0a78e988d
7":{"title":"{bucket_0_button_text}","url":"
{bucket_0_button_url}","target":"_blank"},"field_5cd0ac735f37b":"
","name":"acf/cta-banner","align":"","mode":"auto"} -->
This would map three ACF fields from an old site (the headline, button text, and button URL) to a new ACF-based Gutenberg block named CTA banner.
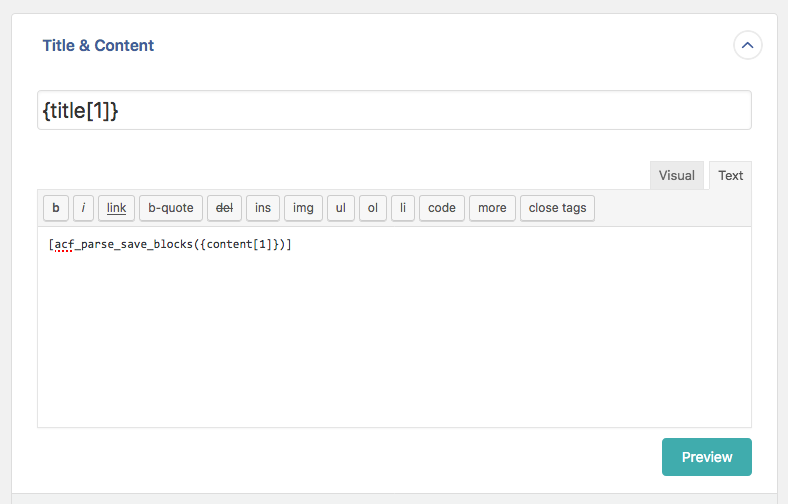
Then, as part of the import process, you’ll need to run the imported content through acf_parse_save_blocks. This prompts ACF to look for any ACF blocks in your content and create the metadata (including setting up the block ID). Note that the id does seem to need to be present with an empty value, rather than omitted entirely, for this to work.
If you’re using WP All Import to import your content, you can call that function as part of your field mapping:

Watch out for extra spaces in your export file too! Extra whitespace or line breaks between tags with a Gutenberg-commented block can create unwanted extra spaces when viewed in the editor.
While, depending on your needs, it make take some manipulation of your content to get it Gutenberg-ready, you can start using Gutenberg on a new site without leaving your legacy content behind.
Thinking about migrating your site to a new CMS? We’ve got thoughts — let’s talk about it.